
Blog de LEDMall
Instalación de rejillas LED: 6 métodos de montaje y comprobaciones de seguridad
Oct
Where should an LED grille screen go? Start with three questions at the proposed site. Can viewers see the whole screen? What will carry the frame and transfer its loads to the building or foundation? Once the screen is in place, how will a technician reach the service side and remove a module?
1. Six Mounting Methods for LED Grille Screens
For a glazed facade, first decide which side of the glass the screen will occupy. Two displays can look similar from the street while requiring different supports, weather protection and routes for maintenance.
Método de instalación | Posición de la pantalla | Qué verificar |
|---|---|---|
Pared externa | Against an exterior building wall. | Confirme el estado de la pared, la ubicación de los anclajes y una ruta de mantenimiento accesible. |
Exterior de una fachada acristalada | Una pantalla colocada delante de una fachada acristalada. | Have the facade engineer identify where the frame can transfer its load to the building. |
Dentro de una fachada acristalada | Una vitrina situada detrás del cristal. | Check reflections from the intended viewing position and leave room to remove a module. |
Rooftop | Una vitrina vertical sobre el edificio. | Locate the roof supports on the drawings and review wind exposure and roof access with the engineer. |
Montado en columna | Un expositor independiente sostenido por columnas. | Revise las columnas de soporte, el diseño de los cimientos, la dirección de visión y los accesos circundantes. |
Suspensión de techo o superior | Una pantalla suspendida de una estructura elevada. | Utilice un sistema de suspensión aprobado por el fabricante y verifique el sistema de soporte completo. |
2. Site Survey and Structural Review
(1) Check the view and the service route
Walk to the intended viewing position and photograph the proposed screen outline. Note trees, signs or neighboring buildings that hide part of it. At the screen location, mark the service side on the drawing and check that a technician can reach the connectors and withdraw a module with the specified tools.
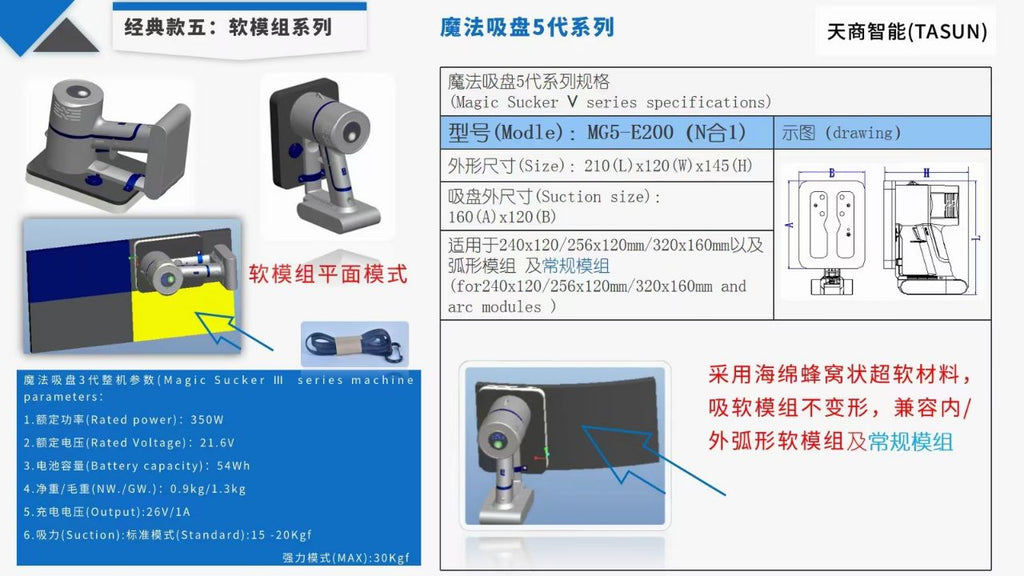
The MG5-E200 sheet illustrates front servicing of compatible LED modules. Check the grille screen manual for the removal method specified for your module.
(2) Trace the load path
Give the structural engineer the screen dimensions, installed weight, frame drawings and proposed fixing locations. Include brackets, cables and other attached equipment. For an outdoor screen, supply the manufacturer’s wind-load data for the proposed configuration. The engineer can then assess the forces on the fixings and the structure that carries them.
(3) Resolve differences on site
Compare the actual support positions with the approved drawing before lifting the first section. If a bracket lands between supports or a cable route blocks the service opening, mark the difference on the drawing. Have the responsible designer resolve it before work proceeds at that location.
3. Safety Checks Before Lifting and Power-On
(1) Prepare the lifting area
Use trained installers and the lifting points, hardware and assembly sequence specified for the screen. Check for loose objects overhead. Set up barriers below the work area and agree on a route that keeps pedestrians and vehicles clear during the lift.
(2) Check the electrical installation
Keep power isolated during wiring. Before energizing the screen, have a qualified electrician verify the supply, protective earthing, cables and protective devices against the model manual and the approved electrical design. For exposed installations, include the connectors and cable entries in the weather-protection check.
4. Commissioning and Handover Checklist
- Inspección mecánica. Record who checked the installed frame, fixings and panel connections against the approved drawings.
- First power-on. Follow the manufacturer’s commissioning sequence. Display a test image that spans panel boundaries so the operator can see whether each section shows the correct part of the picture.
- Fault record. Identify a faulty section by its position on the layout. Record the symptom and the result of the retest after correction.
- Operator handover. Provide the final layout, inspection records and model manuals. Show the operator where power can be isolated and how to arrange access for service.
For other outdoor configurations, see the Guía de instalación de pantallas LED para exteriores. If you need the manual for a particular screen, include the model number when you Contacta con LED-Mall.
5. Preguntas frecuentes
(1) Can a grille screen be fixed directly to a glass curtain wall?
Only use attachment points identified in the approved facade and structural drawings. A position in front of the glass tells you where the image will appear. It does not establish that the glass or a nearby mullion can carry the display.
(2) Does an open grille reduce the wind load enough to skip an assessment?
No. The percentage of open area alone cannot tell you the force on the frame or its anchors. The engineer needs data for the particular grille arrangement and the wind conditions at the installation site.
(3) How much weight must the support frame carry?
Start with the combined installed weight of the display, frame, brackets and cables. The engineer uses that information alongside the other applicable loads and design factors to size the supports. A single multiplier of the screen weight cannot establish the required capacity for every site.
(4) How much clearance should I leave behind the screen?
Use the service drawing for the selected model. For a rear-service display, check the space needed to open covers, use tools and remove the largest replaceable part. For a front-service display, verify where the power supplies and connectors are accessed before closing the space behind it.
(5) How can I check visibility before installing a screen behind glass?
View a sample through the actual glazing from the intended audience position. Check it in daylight when reflections are strongest at that site. Look for mullions crossing text or logos, especially near panel edges, before fixing the final screen position.
6. Conclusión
Choose the mounting position where the audience has a clear view, the engineer can verify the supports and a technician can reach the parts that need service. Mark those decisions on the installation drawing before ordering the frame. At handover, give the operator the drawing as built, together with the commissioning results, so the next service visit starts with an accurate record.